
How to add a new navigation menu to your WordPress site
Do you need to show an extra navigation menu on your WordPress site? Or perhaps you need to show a bunch of links someplace? No matter your use-case, WordPress provides navigation menus that are very easy to create, manage and display. If you like the drag and drop interface of the navigation menus management screen, and you so you figured you’ll create a menu to show them.
However, you neither want to show them in the sidebar (“Custom Menu” widget), nor in the content (“menu shortcode” plugin), and your theme doesn’t quite allow you to display it exactly where you want. What do you do? You need to register a new menu location. Let’s see how.
For this tutorial, we’ll use the free and popular Olsen Light theme. Let’s say we want to add a top menu, right above the logo. I’ll assume you’ll be using a child theme, so future theme updates won’t discard your customizations. Let’s start!

Registering a menu location
To register our new menu location, we’re going to use the register_nav_menu() function. Open your functions.php and add the following:
|
1 |
register_nav_menu( 'top_menu', __( 'Top Menu', 'olsen-light-child' ) ); |
It’s pretty straightforward. The first parameter, ‘top_menu’ is just the location ID that we’ll refer to the location with, programmatically. The second parameter is a human readable title, that will be displayed in the WordPress UI. The above line could also be rewritten as:
|
1 2 3 |
register_nav_menus( array( 'top_menu' => __( 'Top Menu', 'olsen-light-child' ), ) ); |
register_nav_menus() allows us to define multiple new menu locations in a single call. In fact, register_nav_menu() itself calls register_nav_menus() in the background.
Creating and assigning a menu
If you now go to Dashboard → Appearance → Menus, you’ll notice that a new location is available, with the name “Top Menu“, just like we defined in functions.php.
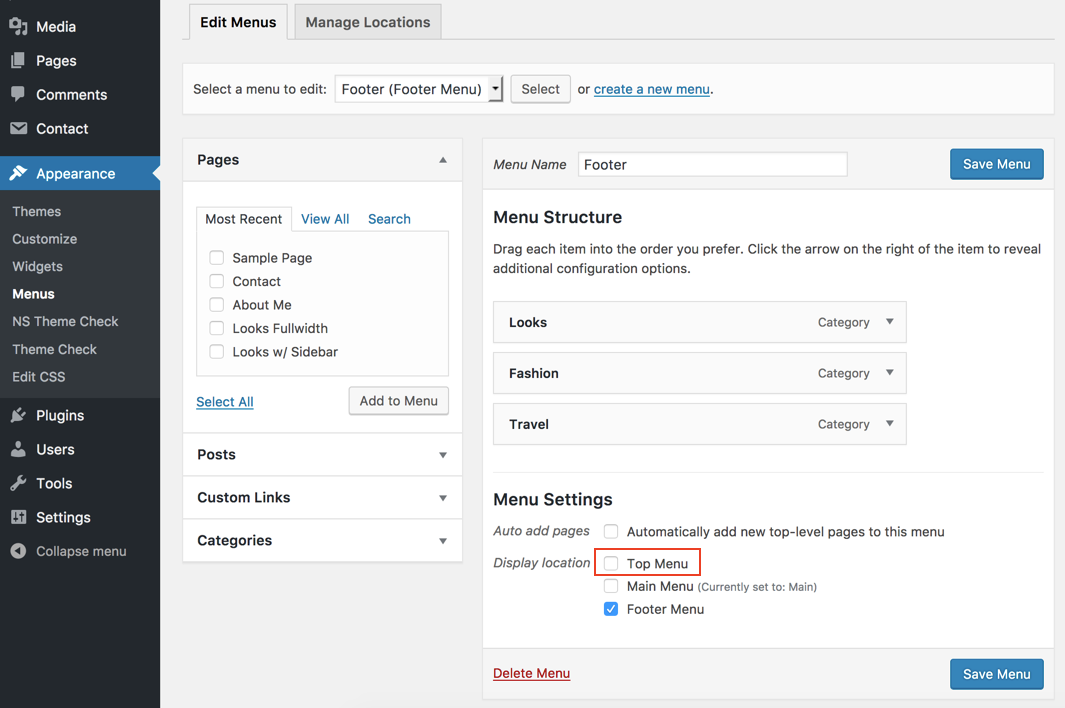
Go ahead and press the “create a new menu” link, assign a few menu items, and assign it to the “Top Menu” location. Also make sure you have one or more sub-menu items, as we’ll need them for the purpose of this tutorial. If you’re not sure how to do that, read the related codex page first and come back. I named my newly created menu simply as “Top”.

Displaying the menu
We’re gonna need to add some code in header.php so if you don’t have it in your child theme, grab a copy from the parent theme. Right after the opening <body> tag (around line 10, might change from version to version) you’ll see these lines:
|
1 2 3 4 5 |
<div id="page"> <div class="container"> <div class="row"> <div class="col-md-12"> |
To be exactly, here’s where our code will go, as I’ll not be including the surrounding HTML elements in the code listings that are to follow:
Second, we display assigned menu by using wp_nav_menu() and passing the ‘theme_location‘ parameter we’re directing it to show whatever our ‘top_menu‘ location is assigned to.
At this point, we can refresh our page and see what happens.

Success! It’s ugly, but it works! Now it’s mostly a matter of styling it according to our needs. If you inspect the new menu with your browser’s developer tools, you’ll find that this markup has been generated (yours will differ, but should be quite similar):
|
1 2 3 4 5 6 7 8 9 10 11 12 13 14 15 16 |
<div class="col-md-12"> <div class="menu-top-container"> <ul id="menu-top" class="menu"> <li id="menu-item-505" class="menu-item menu-item-type-custom menu-item-object-custom current-menu-item current_page_item menu-item-home menu-item-has-children menu-item-505"> <a href="http://www.localhost.com/preview/olsenlight/">Home</a> <ul class="sub-menu"> <li id="menu-item-506" class="menu-item menu-item-type-post_type menu-item-object-page menu-item-506"><a href="http://www.localhost.com/preview/olsenlight/about-me/">About Me</a> </li> </ul> </li> <li id="menu-item-507" class="menu-item menu-item-type-post_type menu-item-object-page menu-item-507"><a href="http://www.localhost.com/preview/olsenlight/looks-fullwidth/">LooksFullwidth</a></li> <li id="menu-item-508" class="menu-item menu-item-type-post_type menu-item-object-page menu-item-508"><a href="http://www.localhost.com/preview/olsenlight/look-sidebar/">Looks w/Sidebar</a></li> </ul> </div> </div> |
|
1 2 3 4 5 6 |
wp_nav_menu( array( 'theme_location' => 'top_menu', 'container' => '', 'menu_class' => 'nav navigation', 'menu_id' => 'menu-above-logo', ) ); |
‘menu_class‘ and ‘menu_id‘ set respectively the classes and ids that the <ul> element will get. Just add/remove anything you need. Similarly, there are ‘container_class‘ and ‘container_id‘ parameters that behave exactly the same but apply on the container. We could have used, but we don’t need a container anyway, so we set ‘container‘ to an empty string to no longer include it, but we could have instead set it to ‘nav‘, ‘span‘ or any other non self-closing element if required.
Classes .nav and .navigation are already used by the theme, so I’m reusing them for brevity. They are enough to demonstrate how menus are affected.
If you now refresh your page, you should see that the menu has been transformed. If you also hover over the item that has sub-menu items, you’ll see them expanding to show.

But hey, this is a top menu and we don’t actually need sub-menu items. Should you (or your other administrators) always have to remember not to assign a sub-menu at this location? Heck no!
|
1 2 3 4 5 6 7 |
wp_nav_menu( array( 'theme_location' => 'top_menu', 'container' => '', 'menu_class' => 'nav navigation', 'menu_id' => 'menu-above-logo', 'depth' => 1, ) ); |
You can simply pass ‘depth‘ as 1 (the default is 0, which means no limit), which will limit the menu to just one level. Or change it to any other non-zero number that suits your requirements. Now refresh again, and witness the marvel of WordPress automatically discarding sub-menu items!
Napsat komentář